Monday, April 6, 2020

Gardening during World-Wide Crises


Gardening and agriculture has been a massive part of human evolution throughout time. It's also extremely important to human evolution as well. By learning how to culture crops and better manage the soil, we as a species have achieved amazing possibilities. We've learned to rotate crops to ensure soil salinity and fertility, learned how to breed plants to make new ones called hybrids, and even genetically modify plants to be larger for more sustenance and nutrients. Now, GMOs are not necessarily bad, but some people don't like how we genetically change the food we eat (even though we've been doing it for millennia).

With all of the stay-at-home orders being issued by political officials due to the spread of COVID-19, it's hard to stay busy. Whether you're binge re-watching The Office for the 6th time or playing video games religiously, they can get boring after such repetition. So today, I want to talk about how gardening has been used for therapy and busy work during world crises like this.

In the early 20th century, George Washington Carver, an African American agricultural scientist and inventor wrote an agriculture tract discussing the importance of gardening during times of crisis. Of course, the crisis he was referring to was World War 1, the bloodiest and most atrocious global conflict humanity has ever seen. Carver brought up the idea of a "Victory garden" which are gardens in private residences and public spaces that were used to grow and produce food for rations for soldiers overseas.
Victory Gardens in World War II - UC Master Gardener Program of ...
These types of gardens continued to see popularity during WW2 and other conflicts at the time. They kept housewives and children busy while their husbands and fathers fought overseas. Of course this is an outdated stereotype that women primary use gardens, but it isn't hard to believe that women were the poster children of V gardens or gardening in general. A majority of men were at war, leaving most of their wives, sisters, daughters, etc. at home.
Victory garden - Wikipedia
A similar spurt of gardening popularity grew during other times of crisis as well. More specifically, during the Spanish flu pandemic of 1918 and other larger outbreaks, there were an overwhelming amount of reports of depression, anxiety, and other mental illnesses. Scientists can't exactly link these spikes in mental illness to pandemics, but it's safe to say that the foreboding sense of mass death would make a large number of people depressed and anxious. Doctors who specialize in mental health say that distractions are important parts of balancing mental health. Now distractions are in no way, shape, or form cures for these ailments and as someone with these illnesses, I'd be quite offended if that were suggested to me as a cure, but it is scientifically proven that distractions are effective short-term resolutions to battling depression and anxiety.

One of these distractions is gardening. While it's unknown how much garden activity was done during the 1918 pandemic, it's a probable possibility that people turned to it as a source of entertainment since people during that time didn't have YouTube or Netflix to consume their time.

The current pandemic that is affecting our society has showed that gardening is actually one of the more popular quarantine activities. National retail seed sales since mid-Feburary into early March spiked by almost 23% which suggest that a lot of people are in fact gardening. However; for the sake of gardening, this pandemic couldn't have come at a better time. With the warmth of Spring just around the corner and all the time in the world, crops and herbs can grow and be maintained with absolute care.

I hope that this blog post was helpful and educational about how gardening was used as a therapeutic and patriotic hobby to boost morale and keep hands busy during a crisis.

Saturday, February 22, 2020

Ozette Potatoes - Washington's oldest Potato species and the history behind it

The Ozette potato, Solanum tuberosum, or more locally known as Makah Ozette or Anna Cheeka's Ozette, is the oldest grown potato species in the Pacific Northwest. This plant was grown and cultivated for over two centuries by the native Makah tribe. To learn about the potato, we first must learn about the people who used it as a primary agricultural food source for so long.

The Makah (which translates to "the people who live by the rocks and seagulls") people have been living in the Northwest tip of the Olympic Pennisula for around 3,800 years. The tribe lived around what is now Neah Bay, Washington. They built their villages and longhouses out of the local populations of Western Cedar tree. The Western Cedar was vital to their way of life. They used its bark to make water-resistant clothing and bags. They used trunks to make canoes and roots to make baskets. 


A Makah Settlement (1900)

The Makah diet consisted of mostly seal, fish, shellfish, and whale with Ozette potatoes as a filler or side. Tribeswomen also harvested nuts, fruits, and edible roots and plants. They also hunted occasionally for local deer and elk populations. The Makah people grew primarily Ozette potatoes. 

The origin of the Ozette potato is from early historical accounts of Spaniards who arrived in the NW in the late 18th century. The Spaniards built Fort Salvador Fidalgo, now Neah Bay in 1792. The gardens at this fort contained several 'New World' plants such as potatoes and tomatoes, with one of these potatoes being the Ozette potato. In the 1860's, a schoolteacher who lived among Makah, James Swan, indicated that the potato was a staple of the tribe's diet. The potato was exclusively grown in Makah gardens until 1980 when it was marked by a seed vendor in Idaho. 

A phylogenetic study done at the Washington State University showed that the potato may have directly originated from South America while all other potato varieties arrived from European imports. 

Sunday, February 9, 2020

New Manager Bio: Trystan Rackham


Hello all! My name is Trystan Rackham and I am a new garden manager for this semester. I am very excited to work in the garden this Spring. There are a few exciting projects on the horizon that I am trying to organize so I am excited to be a part of the garden management team! Here are a few things about me to better know me:

I am a senior working towards my BS for Environmental Science. I have academic and research interests in specifically climate change and ecological impacts of climate change, but the environment in general is what I care about most. I am not originally from the Pacific Northwest like most of the other garden managers. I came to Saint Martin's University from Pennsylvania. When I was younger, I never lived in the same place for long because my father was in the military so we moved around quite a bit to places like Hawaii, Utah, Colorado, and then several places in Pennsylvania itself. So I am more or less an "implant" as people call it.


Me at Elwha River last February

When I was younger I didn't really have a large outdoor life due to my parents also not having a large interest in the outdoors. However, as I grew older and even to the present, I love going on hikes and spending my time outside. I've always had a connection to the earth and that's only increased as time goes on. Around the time I was in middle school, my faith evolved from Roman Catholic (my mother's beliefs) to Norse Pagan or Asatru (belief in the Aesir, or belief in the gods). So my religious beliefs and my interest in nature blend really well and it definitely serves as a motivation for my aspirations and interest in the environment.

I don't have a ton of gardening experience, but I was in 2016's Fall UNI101 Oikos floor class with Catherine, a former garden manager and in that class we did a lot of work in the garden, so that was a great experience and I wanted to use those skills I learned from that class more.

Wednesday, September 19, 2018

There will be life


     Welcome back everyone! I will be the garden manager for this school year. This year I plan on working more closely with Dr. Gendelman’s UNI class during the Fall so that the garden can be well prepared for spring. My goal for next semester is to maximize the garden’s productivity for spring and summer students with apartments and grocery bills. This means getting things growing as early as possible, preparing the sprinkler system for summer’s heat, and of course enjoying the outdoors!

Lovely crops of apples and pears this year. Unfortunately, this isn't a fig year.

A little Puget Sound gumweed. The seed fell from one of Dr. Bode's Grasslands Project plans when he was housing them in the greenhouse over the summer.

     As summer winds down, the perennials get a break from the heat and the annuals finish up their flowering. The surviving grape and kiwis weren’t on the sprinkler system during the summer, causing most of their leaves to brown and wither. During my field ecology class, when we were talking about the Pacific Northwest’s flavor of climate change, the learning garden’s kiwis came to mind as an analogy.

Only one of them appears to have survived, most of her leaves are completely dead, the stem appears browned, the plant’s growth has been stunted. But on the tips of some of her lateral stems are five leaves, as green as a cotyledon’s dorsal surface. These leaves must be fresh, perhaps three weeks old! They are a testament to how nature can survive here in one form or another, even through drastic climate changes. Western Washington’s fires may be more frequent, moist-loving plants may retreat north to British Columbia, western hemlock may lose more needles, and big leaf maples may droop towards the end of August, but there will be life.  

Grandpa parsley


Chamomile

    Exhibit B is the herb population. All the mint, sage, rosemary, and chamomile look like their jumping out of their beds. The two-year-old parsley’s seed heads appear to shove their faces into yours, as if to say “My children are everywhere now, whatcha gonna do about it?” Sorrel is making happy green bunches in each of the beds, a stray anise sits in the middle of a walkway, and I found a hidden French lavender that I completely forgot about. There’s a lot going on here, and most of it smells amazing.

    On our list of things to do is to harvest herbs and friends, clean up, and prepare for the next round of crops. So Let’s work as hard as our little garden does to keep this place flourishing and have lots of fun along the way!

These were planted in early August when I visited campus from expired seeds. Only carrots, radishes, and a couple beets actually sprouted. At least the carrots will ripen enough to be useful.


Monday, April 16, 2018

Rain check - The Plant Sale is postponed to April 24

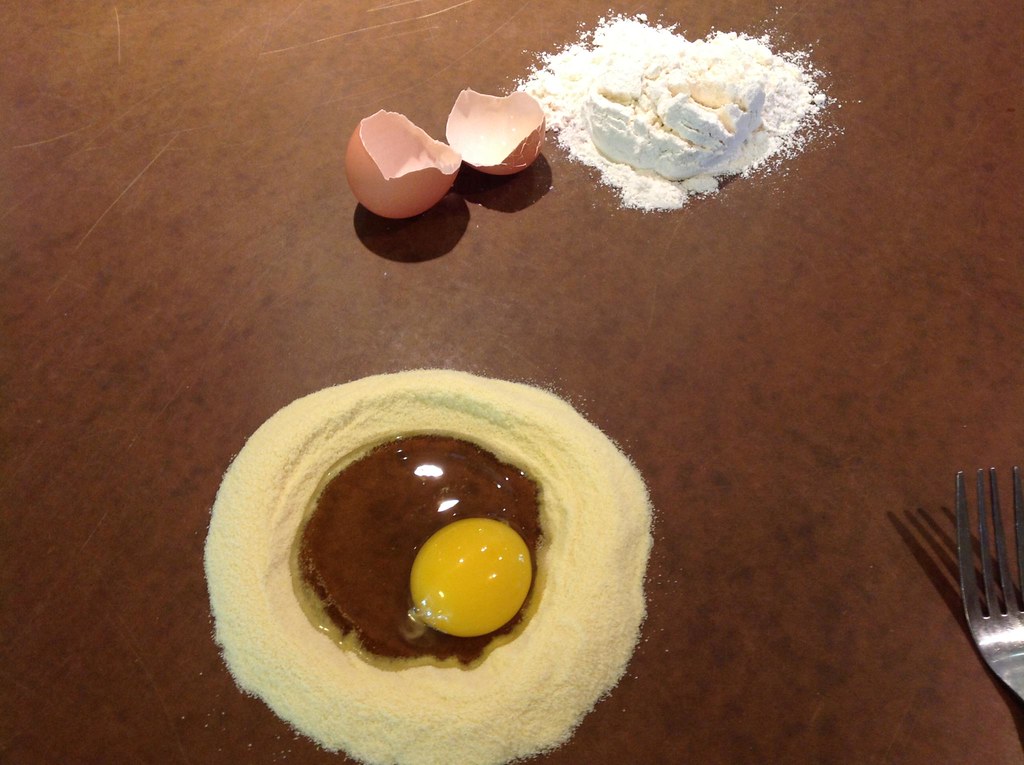
Meanwhile, here is something fun to do at home while it's raining.    How to make fresh pasta

Wednesday, April 4, 2018

Spring Awakening - Garden Sale


Hello Everyone!

I hope you all had a great winter and kept warm through the unusually large amount of snow we got here in Lacey. While we were all bundled inside drinking hot cocoa and binge-watching Black Mirror the Learning Garden was busy at work. 

In the fall, Catherine, the Oikos Residence Floor and I planted four varieties of garlic. All through those cold winter months, the garlic was getting ready for harvest that will be coming late this summer and will then be ready for eating! 

The raspberries went dormant over the cold months and have begun to wake up as well as the herbs throughout the garden.

In these first few weeks of sunshine and above-freezing temperature, Catherine and I have been busy in the greenhouse planting seeds and transplanting starts for the garden sale! 

The garden sale is Tuesday, April 17th and 24th from 11am-1pm and 4pm-6pm. On the 17th we will have guest herbalist Kate Tossey there to talk about safely transplanting your newly bought starts into your garden as well as previewing some of her product


Can't wait to see you there!

Monday, November 13, 2017

Winterizing Raspberries

This is just a quick post about how I winterized raspberries in the garden. I used a method that my grandmother taught me, though versions of it are fairly common.
 
Everywhere that I've planted raspberries in the past has been less than ideal. For me, they're one of those plants that get planted/transplanted after everyone else and usually in poor soil. Fortunately, most of the raspberry work in the learning garden has been already done for me. There is still a lot of gravel that has leaked from the other side of the fence and contaminated the soil, so I used my usual tactic here.

Related image
I think these are boysenberry canes, but this is a good example of
the visual difference between primocanes and floricanes.
It can still be difficult to tell the difference at times with raspberries.
In fall, first let the raspberry stems go to sleep partway so that you can more easily identify one-year-olds, or primocanes, that will revive next spring and the spent two-year-olds, or floricanes. The primocanes are generally greener and more elastic, with dormant lateral buds. The floricanes are more brown, with more dead lateral branches and no living buds. If you're not sure which is which, you can make a small cut on a bud or the bark to check for sleeping green underneath. The floricanes can generally be twisted off at the base, but may require cutting. The learning garden this year didn't require any thinning, but I have thinned in the past to a few canes per base, about 5" apart.

Once all the dead bits are removed, next you work on the soil. I have always just added any organic matter/soil mixture available to me, sometimes a mixture of soil and store-bought manure, sometimes manure form my chickens, sometimes soil from a patch of 'black earth' in the woods. This year at SMU, it was from the compost pile. I usually use a hand fork to work in the fresh dirt. Some roughness can benefit the roots in the long run if you do it in the fall. This year, however, the soil was so compacted that it was difficult to dig farther than a couple inches. I decided to just add the soil on top. My hope is that the healthier addition will encourage more micro- and macroorganisms that will loosen things up a little.

After the soil amendments, I added straw, spreading it until just after I am unable to see dirt (lawn clippings function similarly). The straw has a few functions. It keeps the soil a little warmer in the winter, protecting new shoots that are waiting for spring. It also smothers weeds and prevents seeds from reaching the soil and establishing themselves. Eventually the straw decomposes and can be worked into the soil as an amendment. I prefer straw over lawn clippings or leaves because it breathes a little better, but what I use typically depends on what is available. A fun bonus of using straw is that sometimes a few wheat grains are mixed in and germinate. I usually let them go to seed so that I can use them as a learning tool when talking to my younger siblings about where our food comes from. 

After this, I generally leave raspberries alone until they fruit. There may be other ways of coaxing yields, but this method has worked well for me thus far.

Have a lovely Pacific Northwest day!

Monday, October 30, 2017

Winterizing the Garden


As fall winds down the plants are soaking up the last few days of sunshine and warm weather to hold them through the cold Pacific Northwest winter. So far to prepare the garden for winter Catherine and I have harvested all the dry green beans and took down the stalks, harvested the horseradish, radishes and green onion, mixed coffee in the blueberry pots and turned the compost bins. Although, we still have quite the list of chores to complete before the first freeze and intense rain arrive.

One concern for the winter is our empty above ground garden beds. As the weather becomes worse the soil will become compacted and lose nutrients if not protected or regularly turned. One method to combat this common PNW problem is using ground covers. Ground covers work by providing the soil protection from the rain and freezing weather as well as reintroducing nutrients to the soil and giving a little bit of life back to the garden. For the type of weather experienced here in Washington, it is important the ground cover plant does not need regular sunshine and can handle large amounts of rain and cold weather. A few plants that are ideal for this are: Hydrocotyle sieboldii commonly known as creeping crystal, Soleirolia solerolii also known as Baby's Tears and Mentha requienii also called Corsican Mint. These are only a few examples of the many ground cover plants that can handle the damp and shady PNW winter weather. These will be planted in the bins that previously held green beans, radishes, kale and onions. Ground cover plants will also fend off weeds over the winter so when we pull up the ground cover the soil will be perfectly ready for new plants.

Another project will be creating mulch for the grapes and kiwi plants as well as protecting the strawberries from the weather. To create a mulch for the grapes and kiwi Catherine and I will be gathering bags of leaves that may otherwise suffocate the plants they fall on to shred that will then be mixed into the soil around the roots of the plants. As for the strawberries they needs a thick layer of straw around the base of each plant to protect them from freezing. Oat, rye and wheat straw are best to be used as they are not heavy and won't smother the plants.

Finally, to get a head start on spring projects we are going to work on weed prevention. As our garden is organic we do not use pesticides and weed killer. Instead, we will be placing cardboard over the weeds that cover the pathways between planter boxes and cover that with bark. As the cardboard decomposes it will smother the weeds beneath and create new paths that are weed free. Giving our garden a nice and tidy look. This will be one of more labor intensive projects but will be worth the work when spring rolls around and we can focus all our attention on new plants and starts instead of weeding for two weeks to prepare.

Hope everyone has a beautiful pacific northwest day and found some use in this blog post about how to winterize your garden!


Monday, October 16, 2017

Horseradish Galore

With the colder fall days approaching, Catherine and I have begun winterizing the garden and harvesting all of the late fall crops. Last Friday was dedicated to harvesting the immense amount of horseradish that had been planted in the spring. As I have never worked with horseradish before I was unsure of how to harvest it and what to do with it after. So here is a fun little tutorial for all the horseradish lovers out there!


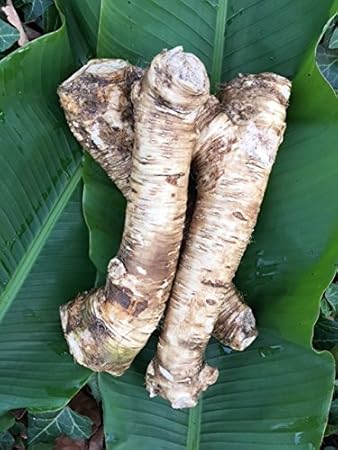
Harvesting horseradish is a lot of work. The roots (the part that is actually used) are very brittle and break easily so it is important to be careful when digging them out. The best way to go about harvesting is to use a small shovel to loosen the dirt around the base of the plants and to pinpoint each of the roots. Removing the leaves from the plant proved to be helpful as there was nothing in the way when I began to dig out the roots (I later turned these into a green mulch for the planter boxes that will be empty for the winter). In general, roots about the size of your thumb or larger are the ones you will want to keep. Horseradish roots grow out horizontally under the soil instead of vertically down which makes them easier to pinpoint. How I went about harvesting the large roots was after pinpointing them I followed them and cleared the dirt around it until I found where the root divided into smaller ones that could not be used and broke it off there. I would then go back and pull out the smaller roots which ultimately went in the compost bin. Harvested roots can also be replanted as it will grow back more for next season.

After all your horseradish is harvested clean it all and lay it out to dry. It is best to then cut it into smaller pieces and if you choose to store it place it in a sealed bag in the freezer. Frozen, horseradish will be good for 4-6 months. But, it can also be used fresh. Grated horseradish can be added to a variety of things from hummus to sandwiches wraps or used to make a fresh sauce. Below is a recipe for a horseradish sauce made using freshly harvested roots. It also has many naturopathic home remedies. Horseradish has been known to clear sinuses in the same way a spicy food would when eaten, making it a commonly used remedy for sinus infections that is safe for longterm use. It has also been used for alleviating arthritis and nerve irritation. So, despite horseradish being a taste not favored by all it can be a very helpful addition to your medicine cabinet.
Image result for horseradish plant


Recipe:
    1. 1 cup sour cream.
    2. 1/4 cup grated fresh horseradish.
    3. 1 tablespoon Dijon mustard.
    4. 1 teaspoon white wine vinegar.
    5. 1/2 teaspoon kosher salt.
    6. 1/4 teaspoon freshly ground black pepper.

Monday, October 9, 2017

Ivy, Ivy Everywhere

Thus far, we have been harvesting the scallops, potatoes and beans, kale and herbs. The little greens in the middle planter box have been thinned. Kennedy and I have better defined the raspberry border and Kennedy has weeded a definite space around the strawberries. The OIKOS students have planted garlic in the potato bed. We'll likely get garlic and  potatoes in that bed next spring. I've never combined those two before, so this'll be interesting. I wonder if I won't have to add garlic to my mashed potatoes... More gleaning and weeding are to come.

Potato bed with garlic hiding

I dug a shallow trench around these raspberries, lined it with landscaping fabric and filled it with rocks.
That should keep the weeds out long-term.
Edward the mole's work

The plants are starting to wind down for the winter. Stubborn beans are putting out their last vibrant flowers. The blueberry leaves are burning to a dull red color and the spent raspberry stalks are beginning to yellow in earnest. The season-old kale drooping over the planter box reminds me of an old woman sitting on her rickety front porch soaking in the afternoon sun. Only the hardy bumblebees and the occasional hurried honeybee are visiting the last flowers. Hummingbird chattering is seldom, while caws and dark crow shadows circling the compost pile are more frequent. Things are still green, just less so. The garden is putting forth its last effort before it goes to sleep once more. 

However, one plant is doing just fine. And it'll continue as green as always through the winter. Hedera helix, or English ivy, has been planted around campus as a ground cover and has been doing a wonderful job in that department. So wonderful, in fact, that it's beginning to cover the ground around the planter boxes. It's already been cleared far enough away from the boxes for the time being (thank you OIKOS!), but we will undoubtedly need to clear it again this year.

OIKOS cleared the ivy last week. There was a bush in there!
For those who may be unfamiliar, English ivy is a dark green vine with extremely aggressive growth. If left unchecked, ivy can surround flat ground, buildings, old cars and even whole trees. The plant spreads vegetatively at a remarkable rate and colonizes far away places with berries that entice local birds like robins and waxwings. Sometimes even light amounts of herbicide can just drip off the waxy coating on the leaves. The plant itself is mildly poisonous when ingested. In Washington, it is a Class C invasive species, so while it is recognized as invasive, it is perfectly legal to plant it as a ground cover.

Berries at various ripening stages.

The ivy next to the garden is producing a second batch of flowers. At first I only saw paper wasps pollinating them, but now I've been seeing native wasps, hoverflies and the occasional bee.


As a botanist, I find English ivy's success rate fascinating. But as a Pacific Northwest native plant specialist, I also find it alarming. The plant can tolerate a variety of conditions, but it prefers moist soil and part to full shade. Sounds a lot like your average western Washington forest. Sections of the woods next to campus are suffering due to this invasive non-native. It is slowly replacing small plants on the forest floor, like tellima and salal. The ivy is creeping up the Douglas firs, trees that would not tolerate the shade of the vines well. The invasion has not progressed very far as of yet, but eventually large sections of ivy will need to be removed.
Long-term English ivy infestation on big leaf maple and Douglas fir on a Pacific Northwest roadside.

The best method of removing it would be to pull it out manually. You cut the above-ground growth part-way and then pull out the rest with the roots, which are fairly shallow. The vines are tough, tougher than your hands, so gloves are advised. Also of note is the occasional allergic reaction, which will show up as red patches or mild blistering on the skin. Removing English ivy from trees is also a simple process. You cut about 2-3 feet of the ivy from all the way around the trunk. The vines will have embedded themselves into the bark, so you may need a screwdriver to remove them from rough bark. Old vines can become firm like wood, so a small saw may be required to cut them. (In the bio lounge in Old Main, there is a sample of how wood-like the ivy stems can get on older vines.) Pulling out English ivy by hand is a lot of hard work, but it is a simpler process than removing Eurasian milfoil, purple loosestrife or even vinca.
The ivy left on the tree will die off in the coming weeks. Leaves will brown and fall, allowing sunlight to reach the tree branches. The stems will rot more slowly. The ivy in this picture was just cut.
The ivy on the west side of the garden will be a continuous battle. But periodic removal should keep it from interfering with our lovely little plants.

Friday, September 29, 2017

New Manager Bio: Kennedy Birley


Hey everyone! My name is Kennedy Birley, Catherine and I are the new garden managers! I am so excited to have the opportunity to be employed while getting to spend my time outside working with nature. Here's a little bit about me:

I come from a small town about an hour south of Portland that is very farming orientated. Despite not living on a farm I spent my childhood in our backyard that had been converted to a large garden. The maintenance of this garden became my hobby and I could almost always be found in the garden after school or practice or work. One of my favorite things to do when working in a garden is to name and talk to all the plants as I work with them. I have begun naming all of our plants here in the campus garden, such as the rosemary bush near the greenhouse is named Herald and the grape plants are Ma and Pop.

Over the next four years, I am working on receiving my degree in Political Science with both an English and Psychology minor to go on to become a Humanitarian Lawyer. Spending time in the garden gives me the opportunity to relax away from the classroom and homework. A few other things about me, I run long distance relays with my dad and his friends, I have been swimming competitively since I was six years old and I do yoga in my downtime.

I would also like to introduce our garden mascot, Edward. Catherine and I found this little mole while weeding in the garden last week.


Feel free to come by the garden Catherine and I are there on Monday, Wednesday and Friday from 3pm to 5pm!

Sunday, September 24, 2017

New Garden Manager Bio: Catherine Dufresne

New Garden Caretakers!

Hello! My name is Catherine Dufresne. Kennedy Birley and I are the new garden managers for this school year. Here is a little about myself and how I came to be here:

I have always felt a special connection to the Earth, particularly the Pacific Northwest. For the first five years of my life, I lived in a home next to one tree. The seemingly ancient red alder stood behind my house among all the other cookie-cutter houses in my neighborhood. I used to play at the base of the trunk that was so wide, even Daddy couldn't put his arms around it. From spending hours underneath it catching crane flies with my little brother, the outline of the tree's dentate-edged leaves imprinted themselves onto my brain. 

After I turned five, my family moved to a rural area in unincorporated Snohomish County. It is surrounded by boggy woods and swamp, a bird sanctuary, Lake Cassidy and Catherine Creek. Needless to say, there were many more trees for me to explore. Running through Douglas fir and western hemlock and climbing the red cedars helped me learn the flora and fauna of the area at an early age. Diagrams I drew of different species of crane flies and dried devil's club leaves hung in my room. Living next to a lake also gave me opportunities to see diverse bird-life. Their feathers became comfortingly familiar to me; duck and goose feathers were rounded and waterproof, Steller's jays' feathers were the deepest blue, owl feathers had a silent softness to them. Around third grade I filled a notebook with behaviors and feather types of my neighbor's peacocks, and in sixth grade, my parents decided to raise chickens for their eggs. But while I have loved the creatures that run, fly and crawl, if I had to describe my childhood in a single word, it would be "green". 


My little sister with me in the Bog Woods, mid-April.
View of Lake Cassidy from a cedar.
Bob likes to look at himself in the reflection of the glass. That and the cheerios we feed him.

My mother and grandmother managed to turn the mud and clay in our yard into a garden that I inherited by degrees as all three of us got older. I continued to grow their edible nonnatives and added native transplants, creating a system that fed me and the creatures living in the woods surrounding it. 
Because most places around my house are moist and shaded, there were limits to what I could grow in my garden. Most areas I filled with shade-loving natives. Foamflower, youth on age and fringecup tellima were clustered together around the rainspout, and nootka roses and both sexes of trailing blackberry sprawled under a Douglas fir. Salal and red huckleberry grew from a cedar stump and were further shaded by vine maple. Lady and sword ferns were scattered wherever they would fit and be happiest. I also cared for the boggy forests beyond the yard. I set up trails through my property and kept them passable throughout the year for use by my family. Cutting back vinka and English ivy encroaching from other properties was done every other year. I was not entirely sure whether my garden was an extension of the woods or the woods was an extension of my garden.


I couldn't find my garden pictures, but here is a fall scene of a portion of it.

I left all that behind (with a generous layer of compost) when I came to Saint Martin's University. I was drawn here by the campus' small size and residence halls nestled in the trees. This was where I wanted to get my degree in biology with a botany emphasis. That first year, I was part of OIKOS, a group that focuses on sustainability. Our UNI101 class together first brought me to the learning garden. Food and green was spilling out of all the planter boxes! Harvesting all of it honestly felt like Christmas. Once harvesting was complete, we formed groups and divided tasks among them. My group was in charge of greenhouse gardening, 
something I hadn’t ever tried before. I was given the opportunity to apply my botanical knowledge and my desire to be mindful of the environment to a new sort of garden. As the days shortened, the humidity in the greenhouse increased. Long story short, all its residents but some mint and maybe one chard seedling rotted away. 

That spring and summer, I didn't get very many chances to work in the garden and redeem myself. When I saw this job opening, I was exceedingly excited. I can finally get some soil on my hands again! This fall, most of the outdoors work will be taken care of by the current OIKOS students. My pet project will be to get the greenhouse up and running throughout the winter. This will require lots of research, clever resource allocation, and more trial and error, but now that I have some experience on what NOT to do, it shouldn't be too hard. Right?


Friday, August 25, 2017

Polishing things up

The height of the summer has snuck by us slyly, and as we move into fall, I am saying goodbye to the learning garden. Working a full time job an hour away from Lacey and trying to find time to make it to Saint Martin's on the weekends was a challenge to balance. In retrospect, I should have foreseen the toll that this balance would take on me, but I was initially ambitious, yet now feel humbled. I hope that someone with a little more balanced work schedule will be able to give the Learning Garden the attention it deserves.

That being said, the garden has done a remarkable job of taking care of itself, thanks in large part to the automated irrigation system, with lots of thriving beds, and some unexpected surprises.
One of my favorite surprises of the season: Lilies!
There were some other not so lovely surprises, like when I arrived at the Learning Garden after a couple weeks of absence to find that the bean trellis had buckled under the weight of its load!
The beans growing up the trellis before it fell
The beans on the new trellis, a little beat up after the incident
Despite this minor catastrophe, the beans continued to grow prolifically, and some of the bean pods are getting close to a foot long! Many of these are dry beans, meaning they are ready to be harvested when they are nice and dry on the stock at the end of summer, but they are certainly on their way to maturity!
Bodacious beans!
Another unhappy (recurring) surprise was that the tomatoes I planted in the garden never took off! I did plant them a little late in the summer, and they were a little shocked from the initial transplant, but none of those factors were the problem. Instead, each time I returned to the garden, there was a little bit more of the plant that was nibbled off! I assume deer, as they wander around campus quite regularly, but the unidentified animal droppings that occasionally turn up in the garden suggest that there could be another animal lurking around eating the tomatoes.
Nibbled tomatoes on the right, and struggling cauliflower on the left
Because of the state of some of the beds, with some crops like tomatoes being nibbled on, and other crops like cauliflower, cucumbers and zucchini having passed their prime, I decided to turn over some of the beds, clear the old crops out, and sow new seeds for the last bit of summer. After removing the organic matter from the beds as much as I could, I tossed some compost on the top of the beds from the compost bins, made furrows, planted seeds, then covered them up again and watered them in.
There is something satisfying about straight rows
Beet seeds, nestled in the topsoil

The tomatoes and kohlrabi had to go, but the kale stayed
Rainbow chard and kohlrabi are planted
Zucchini and cucumbers, looking sun burnt and sad
The same bed, with cabbage and salad turnips planted
Turning over beds is at once a bittersweet act, bitter because you have to remove plants that you have developed a somewhat personal relationship with, sweet because there are new vegetables that will soon be coming into your life. With my leaving the position as Garden Manager, there is also a metaphorical turning over of myself that I couldn't help but think about while working on this. Like with the garden beds, I am trying to leave this wonderful position planted with seeds, ready to give potential to the future Garden Manager, and the students and community members who come wandering through. I won't be around to see these seeds sprout, but I hope that others will bear witness to these beautiful plant lives about to be born.

My last contribution to the garden was something that had been on my checklist for a while, but had been put off because of how much time was required to do it right. This task was varnishing the beautiful overhead trellis structure that will eventually provide shade and snacks for passersby. There is one young grape vine that is starting to creep up the trellis, and kiwis will be planted by Irina Gendleman and her students when classes start.


The trellis structure, partly varnished
The trellis, fully varnished, subtly toned in the shade

Monday, July 31, 2017

Building Compost Bins


 Last week, July 24th, I set out on a project of building a sturdy compost bin to replace the composting system that I inherited. While the compost was indeed composting, the structure was rather rickety, with spindly wooden posts holding up a plastic netting that was secured to the posts with twist ties that you might find on a bag of bread. It was not exactly built to last, but it definitely did its job for however long it was there. Below, you'll see the old "bin" in its final moments of glory.

Compost bins need love too!
In order to prepare for the construction project, I picked up 5 sturdy pallets (made in Canada) from a local business, and picked up some joints and screws from home depot. All the materials fell into place nicely, I brought the tools I would need for the project from my house, and when I arrived at the Learning Garden, I was ready to build!

Bringing the pallets into the garden with the help of my trusty Subaru
The materials

The materials I needed were somewhat contained, though some things did get added part way through the process. I needed 5 pallets, 12 ninety degree corner joints, a box of screws, the right drill bit to match the screws, a few pieces of scrap wood to sink screws into, a saw to cut them to size, and a little bit of patience for the whole process.

The first corner complete, a few more to go.
Things got off to a good start, with the first two pallets coming together quite easily, but even with the quick progress I knew that things might not be as simple as they seemed. I noticed that the screws were poking through the wood after securing the joints in the corner, and I knew that I needed to fix that.
Sharp metal object hazard!!
Even though the screws were poking into the inside of the pallet, meaning that someone would have to intentionally reach inside the pallet in order to be in danger of getting cut by these screws, I didn't want to take shortcuts. I know that I have cut myself many times on random sharp objects poking out of strange places, and I wanted to limit the chance of that happening to some unknown person in the future.
Splinter hazard, yes, but no pokey metal things in sight!
After working out my little fix for the problem I identified, I figured that things would come together quite quickly, but as so often happens, that was not the case. It was considerably difficult to get the wood blocks back behind the pallets that form the back wall of the bins, and, even though I knew people weren't likely to stick their hands back there to get cut, I figured I'd err on the side of caution. The last thing I want to do is leave sharp things exposed, have someone get hurt, then find out 10 years down the road that SMU had to pay out half a million dollars because someone sued them after they got tetanus while turning the compost pile. It's not likely, but boy is it good to avoid things like that far in advance, whenever possible.

Unexpected surprises found in the compost
As I continued to move the compost around to create space to work in, I kept finding Keurig cups, the disposable coffee pods made for the Keurig machine. I'm not sure if they are actually rated as compostable or biodegradable, but someone in the past thought that they were compostable, and threw them into the pile. Unfortunately, many of the "biodegradable" or "compostable" consumer plastics still have a ways to go before they will actually break down in home compost piles. They are typically rated as compostable only in industrial composting facilities, where compost temperatures routinely stay over 100 degrees, and microbial and bacterial activity is super strong. The coffee inside of the plastic casing was clearly composting though, and there were even a few that had become homes to earthworms and were still moist and rich. I did what I could to empty the coffee out without wasting too much time on the process.

Almost complete!
Another addition that I decided to make at the last minute was adding some metal chicken wire type stuff (I can't think of the technical term) to the back pallets to limit how much compost would be lost through the slats in the pallets. You may be able to see the chicken wire sitting flat against the back pallets, held on with a number of horseshoe nails and a strip of wood at the top and the bottom. The chicken wire was already at the learning garden, and I figured it was a good way to use it. Had I found more lying around, I likely would have done it to all the insides of the bins, but I only had enough for two pallets, and decided the back wall was the most important part to reinforce. Some compost might still escape, but that is inevitable.

Bins completed, compost reloaded, and employee worn out.
All in all, this was a full day project. Between research, getting supplies from various places, revising things on the fly, and trying to take the time necessary to make things strong enough to last, I easily spent upwards of 10 hours on the project. Could it have been done in less time? Definitely. Will I be able to do it in less time the next time around? Hopefully. What I am quite proud of is that this compost bin could last up to 10 years if all goes well. Many times I have made the mistake of taking shortcuts, and, more often than not, I find myself going back to fix the stuff I didn't do right the first time. I still have some learning to do in the realm of construction, but I'd say that this project was a success, and should hold up for some time.